Home Blog Page 3

How to Make Lip Gloss

How to Make Your Own Lip Gloss

If you’re a lip gloss enthusiast, you know that the stuff isn’t cheap. Good, high-quality lip gloss can easily cost upwards of 10 bucks a pop. And if you prefer to use all-natural brands of lip gloss, the price is even higher.

Fortunately, you don’t have to break the bank to feed your lip gloss obsession. Lip glosses of all kinds can be made right in the comfort of your own home. And best of all, it won’t cost you an arm and a leg to do it.

The key, however, is to make sure that you are using the right recipe. Oh, there is plenty of lip gloss content online that swears to offer the best recipes. Upon closer inspection of the ingredients, though, it’s clear that not all lip glosses are created equally.

That’s why we wanted to make sure that you know how to make your own lip gloss using the safest and most effective ingredients. By using our guide, you can trust that your homemade lip gloss will consist of natural ingredients that are safe to use.

No more synthetic ingredients that could potentially leave your lips irritated. Our non-toxic recipe will ensure that your lips look and feel their best. So join us as we share the secret recipe that cosmetic companies don’t want you to know about.

DIY lip gloss

How Do You Make Lip Gloss at Home?

This recipe typically yields a baker’s dozen, meaning you’ll be left with about 13 tubes of lip gloss. Each tube equals 10mL. If you don’t require so much lip gloss at once, you can certainly reduce the ingredients. Conversely, you can also increase the ingredients to make even more lip glosses.

If you want to start out small, take the following amounts and use only a quarter of the ingredients. In doing so, you should end up with about 4 tubes of homemade lip gloss; a humble effort that will serve to give you a feel for the process.

Before we get started, you’re going to need to round up a few ingredients. It’s unlikely that you’ll have everything listed here in your home, so plan on making a store run.

Ingredients

  • Vitamin E capsules (D-alpha-tocopherol Vitamin E) – 3 capsules
  • Cocoa butter or shea butter – 2 tablespoons
  • Lip gloss tubes or containers (10mL each)
  • Cosmetic grade beeswax – 2 tablespoons
  • Grapeseed oil or olive oil – 4 tablespoons
  • Unrefined coconut oil – 2 tablespoons

Furthermore, you may elect to pick up the following essential oils to add to the homemade lip gloss recipe.

  • Rose Red mica powder – 1/8 teaspoon
  • Lavender essential oil – 3 drops
  • Orange essential oil – 6 drops

Making DIY Lip Gloss

  • Start with your grape seed oil or olive oil, cocoa or shea butter, coconut oil, and beeswax. Add each ingredient to a glass measuring cup; preferably, one with a spout that makes for easy pouring.
  • Next, fill a pot with about two inches of water and place your glass measuring cup in the water. The goal is to create a double boiler that will help melt the beeswax, butter, and oil.
  • Using medium heat, heat the water enough to where it causes the ingredients in the glass measuring cup to melt. This should take between 10 and 15 minutes.
  • Then, add the 3 vitamin E capsules. Don’t toss in the whole vitamin E capsule, though. You want to break or cut each one so that you can dump the powder in with your melted ingredients. Most capsules can easily be twisted apart at the center. However, there are some that are incredibly difficult to break free, so it may be quicker just to cut it.
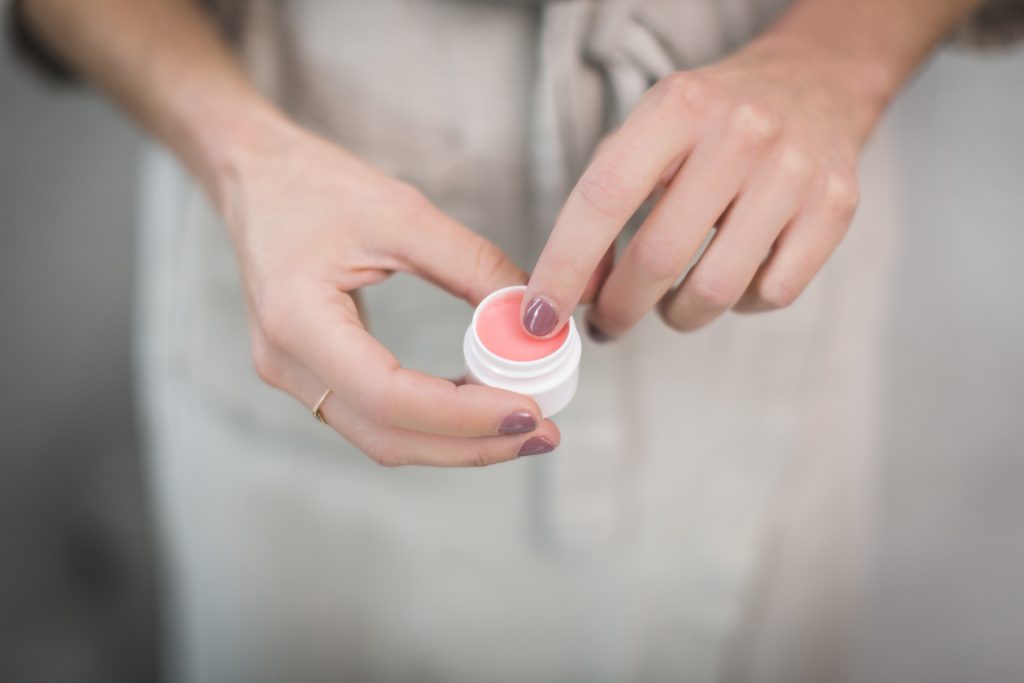
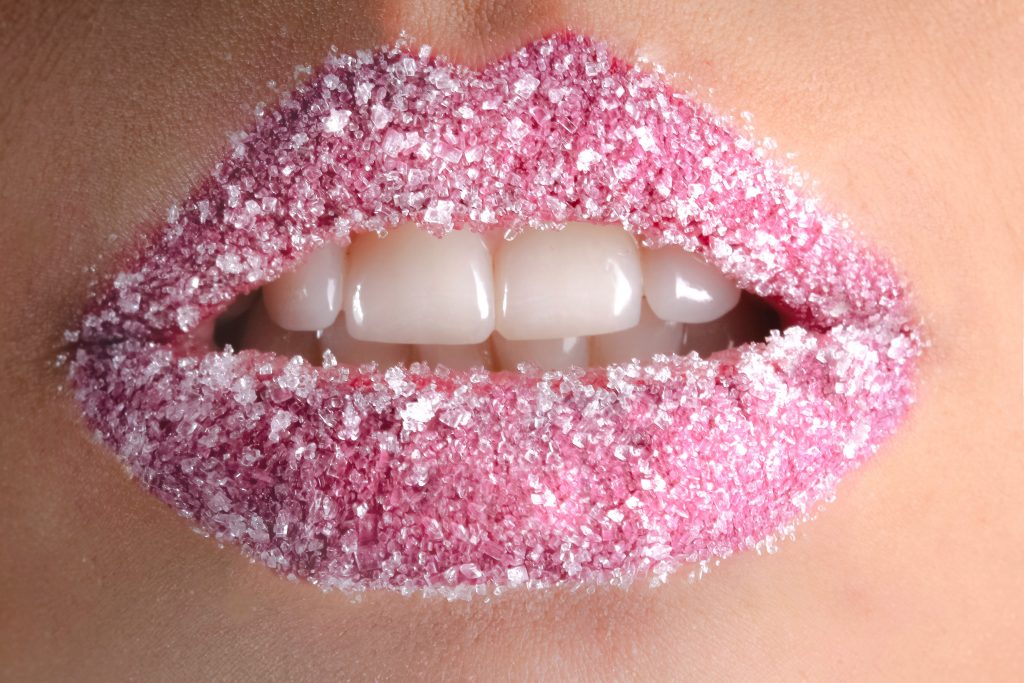
  • How it’s time to add your essential oils and mica powder if you opted to include them in the lip gloss recipe. The red mica powder is a safe mineral powder that serves to give your homemade lip gloss an attractive color.
  • You can choose to add a little or a lot of red powder; it’s entirely up to you how dark or light you want your DIY lip gloss to be. This will also add color to your lips after application, so keep this in mind when adding red mica powder.
  • The essential oils are, well, essential for masking the natural smell of homemade lip gloss. Without the oils, your DIY lip gloss will smell like honey and chocolate. This is due to the beeswax and cocoa butter ingredients.
  • If you decide to forego and coloring or oils, your homemade lip gloss will look somewhat beige in color. However, no color will show up on your lips after application.
  • Now, mix everything together until it is one seamless mixture.
  • Pour the new mixture into your lip gloss tubes.
  • Let the lip gloss containers cool after they’ve been filled.. About 20 minutes should do it.
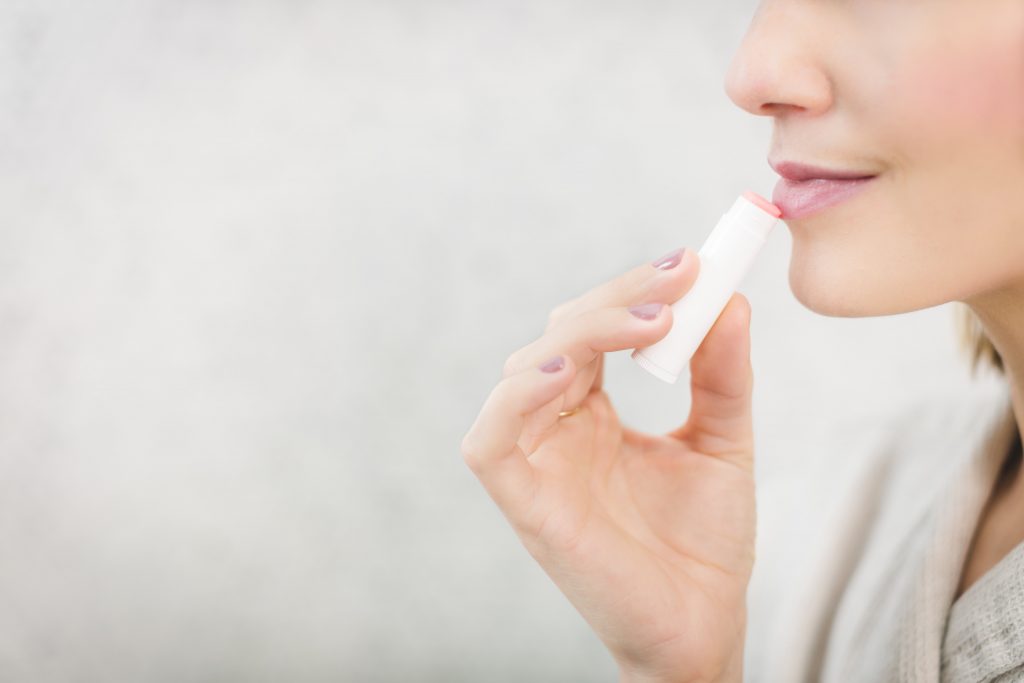
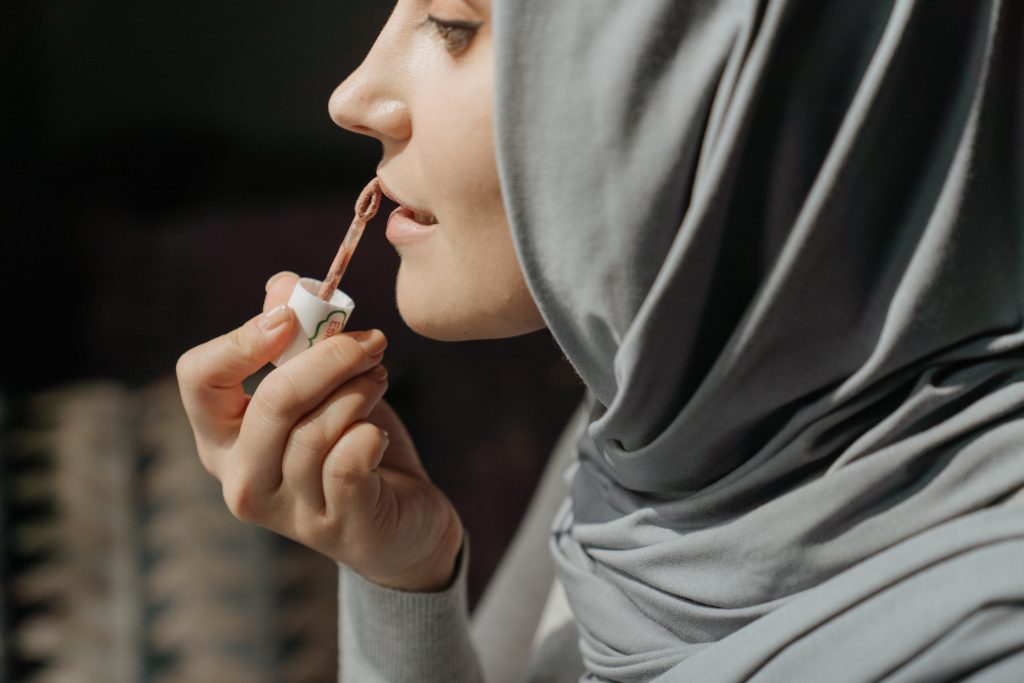
  • Enjoy!

When you choose to make your own lip gloss, you can get creative with the taste by substituting different ingredients. For example, instead of using shea butter, use cocoa butter for a chocolatey taste. Furthermore, you can use honey in the lip gloss recipe for a slightly sweeter taste.

A word to the wise about using honey: Because it is heavier than all of the other ingredients combined, it’s crucial that you add it with the rest of the ingredients while they are still in the double boiler (glass measuring cup).

While the water is boiling, add honey and let it evenly combine with the rest of the lip gloss recipe. This will ensure that everything mixes well before pouring your homemade lip gloss into the tubes.

Adding honey at any other time will cause it to separate and sink to the bottom of the lip gloss containers. It’s also worth noting that if you don’t use your homemade lip gloss fairly quickly after pouring it into the tubes, the honey may still sink to the bottom.

Adding Other Flavors

Some people like to add other ingredients to their DIY lip gloss. This is certainly something you can try, but please keep in mind that even natural flavorings contain solvents or additives that aren’t the best for your lips.

Still, if you don’t have a problem with natural flavoring, feel free to add whatever you like most to this lip gloss recipe.

What Ingredient Makes Lip Gloss Glossy?

Glossiness comes from the oils (grapeseed or olive oil and coconut oil). If you wish to make your DIY lip gloss even more glossy, you might try adding a little bit of extra oil. Just remember that you will need to counterbalance the lip gloss recipe with more beeswax.

This will help prevent your homemade lip gloss from becoming too runny and oily. Beeswax serves as a solidifier and will ensure that your DIY lip gloss recipe makes for easy application.

Lip gloss ingredients

What Are the Best Ingredients for Lip Gloss?

Vitamin E oil or capsules is an excellent ingredient, as it contains antioxidants that help keep your lips looking healthy. All other ingredients are completely safe to use on your lips. However, in terms of healthy properties, vitamin E is going to be the most beneficial.

It’s worth noting, too, that all of the components you add to your homemade recipes is going to be much safer than anything you buy from the store.

Super Easy Homemade Lip Balm Recipe

Want to add color to your lips using safe, non-toxic ingredients? All you need is 15 minutes and items that you likely already have in your home. This recipe is great if you have kids who don’t like wearing conventional lip balms.

If you and your family often struggle with chapped lips during the winter months, you’re going to love this kid-friendly DIY project. Best of all, it’s super easy to make and fun for the whole family. If you’re looking for something fun to do together, this recipe will be a hit.

All you need is some petroleum jelly, cosmetic containers, and Kool-Aid. you can use Kool-Aid packets or the large jars of powder. All that matters is that you have different types of Kool-Aid to work with, as the flavors and colors are what you’re really after.

  • Start by putting one tablespoon of petroleum jelly in a microwave-safe bowl. Set the bowl in the microwave and nuke it for one to two minutes. Depending on how powerful your microwave is, you may need to keep an eye on the contents to make sure that you don’t overdo it.
  • You want to make sure that the petroleum jelly liquefied. When ready, take it out of the microwave and pour a single packet of Kool-Aid into the bowl. If you don’t have individual packets, measure out 0.16 ounces of Kool-Aid powder and dump it in with the liquefied petroleum jelly.
  • Next, start stirring the contents of the microwave-safe bowl until the Kool-Aid and jelly are well mixed. Please note that the Kool-Aid will not completely dissolve in the jelly. This is totally normal and all part of the creation process.
  • When you are satisfied with the mixture, slowly pour it into your cosmetic containers until all are full. It might be easier and less messy if you use a spoon to transfer the homemade lip balm mixture into the cosmetic containers.
  • There are likely to be some sediments left over at the bottom of the bowl that didn’t fully dissolve. Simply discard this.
  • Now, let your homemade lip balms cool for about 15 to 20 minutes.
  • Wear and enjoy!

Homemade Lip Gloss Tips

If you’re having a hard time getting your DIY lip gloss to come out just right, fear not. We are here to help and walk you through your troubles.

One of the biggest challenges people face as they learn how to make lip gloss is that their DIY lip gloss turns out really oily and runny. This is likely due to an imbalance in the ingredients used in the recipe.

If you keep finding that your DIY lip gloss is too runny to apply to your lips, try adding more beeswax. The beeswax acts as a base and will help keep your DIY lip gloss more consistent with over-the-counter lip glosses.

Conversely, if your DIY lip gloss is coming out too thick, you can try using less beeswax in your mixture. Instead of using a whole tablespoon, try using 1/2 tablespoon.

Another issue people have when they want to make lip gloss is that they can’t find any empty lip gloss containers. Lip gloss making is a fun project, but if you don’t have anything to put the finished product in, it’s kind of pointless.

If you can’t find any suitable containers at your local drug store, Amazon is going to be your best bet. There, you can order bulk amounts of containers that are specifically designed for lip glosses and the like.

Save Money Online

Best of all, you get a huge discount when you buy from Amazon. Last we checked, they had several container options to choose from, each varying in quantity and quality. You can get 40 empty containers for less than $5. Keep in mind that these are just the squeeze tube type.

If you want a heavier-duty option, less than $10 will get you 25 high-quality containers. These even have individual brushes in each glass container. You also get funnels for easy pouring, so you’re definitely getting your money’s worth.

Some people who make lip gloss at home have discovered that you can substitute olive, coconut, or grapeseed oil for other food-grade oil. While this is true, please keep in mind that using a different kind of carrier oil will alter the taste of the DIY lip gloss.

It can also affect the smell, as the odor that this recipe currently provides is pretty inconspicuous and pleasing. You can always try different essential oils if you have to use a different carrier oil than what is recommended in this recipe. Just play around with different scents until you find the combination that is most pleasing to you.

Applying lip gloss

Homemade Lip Gloss Benefits

As you can see, making your own homemade lip gloss is an affordable option that is sure to save you a sizable sum of money. Let’s look at some of the other benefits you can look forward to when you make lip gloss at home.

Free From Harmful Additives

It’s no secret that cosmetics contain additives from various sources. When you make lip gloss, you know exactly what’s going into your creation. This is especially crucial if you have young children who like to wear lip gloss.

When you make your own lip glosses and lip balm, you are in control of what your children are putting on their lips. You will have the peace of mind that all of those harmful chemicals and additives used in over-the-counter cosmetic products are far from your children.

What’s more, if you or your children are allergic to certain ingredients in DIY lip gloss, you can actively avoid such ingredients to ensure that no one has any reactions to wearing lip gloss. Although safe and all-natural, there are some components that could cause skin irritation.

Since you are the one choosing what items you use in your DIY lip balm or gloss, you can avoid anything that you and your family have trouble safely wearing.

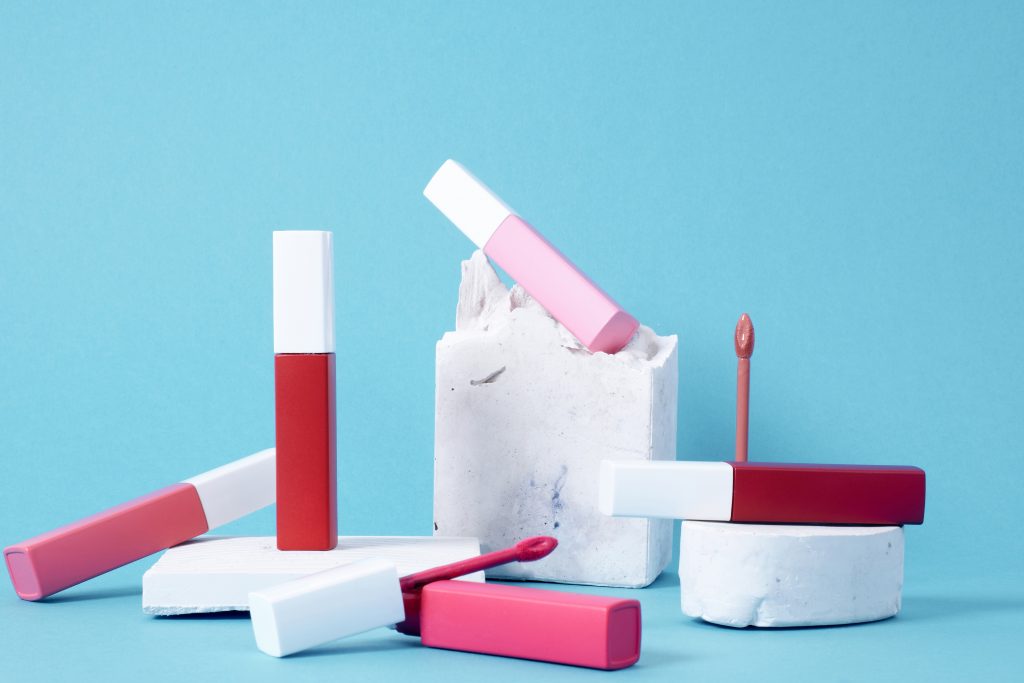
Choose Your Own Colors

One of the reasons that lip gloss is so popular is due to its wide range of colors and flavors available. Many people who wear lip gloss understandably enjoy the taste and aroma that come from the various lip products you buy in stores.

When you make lip gloss at home, you can play around with the various recipes until you find the components that you like the best. Which essential oil provides the best smell? What natural powders result in the most appealing color?

This also makes for a fun family activity with you and your children. Try out different ingredients to see which tastes and flavors suit you best.

Just remember to stick with all-natural items. That is what makes homemade lip balm and gloss so appealing. It’s safe, effective, and a lot of fun to experiment with. Feel free to try different natural colorings. You’ll be amazed at how creative and unique your lip glosses can be with a little bit of trial and error.

Safer and Better

Homemade lip gloss provides better cover and protection for your lips when compared to over-the-counter products. As a result, your lips will feel softer and healthier by avoiding those cosmetic store-bought products.

What’s more, thanks to the natural components used in homemade lip balm and gloss, you will benefit from glossier, more attractive lips.

Lip gloss

Homemade Lip Gloss Disadvantages

Although the benefits far outweigh the disadvantages, it’s only fair that you know what downsides there are to homemade lip balm and gloss. In knowing what to expect, you can work to combat any negative aspects of making your own cosmetic products at home.

Time-Consuming

Let’s be honest; you’re going to need to set aside some time to make lip balm and gloss at home. You first need to go to the store to buy the items necessary for making lip gloss. You also will have to wait for any orders to arrive, such as empty lip gloss containers.

Fortunately, once you have everything in front of you, the creation process is relatively quick and easy. In any event, you’ll still have to carve out some time to put it all together.

Creation Trouble

There’s a good chance that your first run-through will end with less-than-stellar results. This is normal, however, and happens to almost everybody. It takes some time and training to figure out the best formula for the right consistency.

Don’t get discouraged, though. Most people are able to get their homemade lip gloss recipe down to a science after a couple of tries. Above all, have fun with it. Soon, you will be rocking your best homemade lip gloss creation yet.

Short-Lived

Since DIY lip balm and gloss don’t have preservatives in them, your homemade creations aren’t going to last very long. As such, you will likely have to wear your creations quickly to get the most enjoyment out of them.

Due to this, it is advised that you don’t make a whole lot up at once. To start, just fill one lip balm tube and one lip gloss tube. This will allow you to get a feel for how long yours lasts. Once you have determined their lifespan, you will know how much you can safely make up at one time.

What are Earthing Sheets?

What are earthing sheets?

Earthing sheets are specially designed bedding sheets with a conductive material (usually silver) woven through them. The purpose of the conductive material is to ground your body, releasing the positive charge that builds up in absence of contact with the earth.

A tab on the sheets connects to a wire that is plugged into the grounding port on a standard electrical outlet found in most households. The discovery of earthing sheets stems from the fact that most chronic illnesses experienced by nearly a half of the world’s population are caused by our body’s inflammatory response.

To clearly understand how earthing sheets works, let’s take a look at what raised beds have to do with inflammation and chronic illnesses.

Causes of Chronic Illness

Modern science is coming into terms with the fact that a primary cause of chronic illness is inflammation. This refers to a biological response of your body to harmful stimuli triggered by pathogens, damaged cells, and environmental irritants. Inflammation occurs when your body tries to remove any internal threats and facilitate recovery.

When inflammation sets in, the body deploys free radicals, which are electron-hungry molecules. The free radicals swarm around the areas of inflammation, feeding on pathogens and damaged tissues. However, the free radicals may go on to feed on the healthy cells which creates a deficiency of electrons in your body.

In reference to Clint Ober and other authors of Earthing: The Most Important Health Discovery Ever, electron deficiency is inflammation, and this inflammation precedes every known disease.

Chronic inflammation starves our bodies the negatively-charged electrons. And the solution is earthing.  

The Science Behind Earthing

The purpose of earthing is to connect your skin directly to the Earth. It is suggested that earthing helps to connect the skin to negatively-charged free electrons on Earth. Given that the Earth has unending supply of these crucial electrons, it is suggested that reconnecting to the ground can solve this electron deficiency. Walking barefoot and wearing earthing shoes are good suggestions.

What about when you are sleeping on a raised bed?

One of the primary ways that your body mitigates internal threat is when you are sleeping. However, you are under attack by excess pathogens while in bed. Our modern environments are filled with environmental pollutants, harmful electromagnetic frequencies from electrical devices, toxins from products, and much more.

Luckily, our modern problems have a new solution: Earthing/Grounding sheets.

How Do Earthing Sheets Work?

As previously stated, earthing sheets connect your body to the ground such that the electrical current is absorbed through the grounding wire. With the grounding wire in your bedding connecting to the Earth, it allows the electrons to scavenge the excessive free radicals in your body. This also ensures that the electromagnetic radiations are neutralized in your body while you are sleeping.

A preliminary study published in The Journal of Alternative and Complimentary Medicine indicate that participants who slept with a grounding pad showed a reduction in the levels of a hormone associated with stress (cortisol). According to the author, Dr. Maurice Ghaly, they also found that the participants’ circadian rhythm also started to normalize.

The participants also reported an improvement in sleep and a reduction in stress and pain.  

How to Use Earthing Sheets

It is very easy to use the grounding sheets. All you have to ensure is that your bare skin is in direct contact with the earthing sheet. A single wire connected to the earthing sheet is all you will require.

It is also important to ensure that the grounding port in your electrical outlet is functional. Earthing sheets should come with an outlet checker to this effect.

When to Expect the Benefits

According to Earthing.com, you may immediately notice some difference when you start using the earthing sheets. Some people report pains and aches, commonly associated with flu although they are short-lived. It is suggested that these symptoms occur as your body tries to adjust to changes in its electrical system.

Over time, using earthing sheets will help you sleep better at night and wake up feeling refreshed and energized.

Caring for Your Earthing Sheets

Special care is necessary in maintaining the conductivity of your earthing sheets. It should be washed in a washing machine with warm or hot water. You are only supposed to wash it with a mild detergent and avoid lotions, bleach, or oils because they can interfere with conductivity.

If you apply a moisturizer on your skin before going to sleep, wait for up to an hour before going to bed.  

Which Ones Should I Buy?

There are a number of options but I can narrow it down for you. First, you only need ONE grounded item in contact with your body. You’re either grounded or you’re not. So there’s no need to buy a whole sheet set.

Second, these recommendations are all for sleeping. If you want to stay grounded during the day, a grounding mat is a better option.

Here are the options:

Grounded pillowcase: This is my least favorite option because of the oils and make-up residue that can be on your face. Also, you may not always be in contact with a pillow.

Grounded half-sheet: This is usually the least expensive option, and it works well enough. However, a half sheet that lies under you can get bunched up and lose contact. I toss and turn enough that this is a problem for me.

Grounded flat sheet: This is better than a half-sheet though typically more expensive. It can cover two people and will stay in place better than a half sheet, though still can lose contact if you toss and turn a lot.

Grounded fitted sheet: This is my favorite option for a few reasons. It’s usually no more expensive than a flat sheet and it always stays in place so you never lose contact at night. Another reason is aesthetic. Once you make the bed you’ll never see the fitted sheet, which is great because it won’t match the rest of your sheets. My favorite is this one because it’s also made of organic cotton: GroundLuxe Organic Fitted Earthing Sheet

Is It a Good Idea To Buy Meat Online?

There are plenty of reasons to buy food online. New delivery services like Instacart send out people to shop for you according to your online selections and deliver groceries to your door the same day. But if our local grocery store doesn’t have the selections you want, the experience can leave you feeling unenthusiastic about future purchases. 

If you want to buy high-quality meat online, your best bet might be to go with a specialty online seller like GTA Meats that deals strictly with meats. There is no reason why high quality and specialty meats cannot be transported safely. It’s only a matter of transporting it properly, which means it’s likely to be more expensive.

Is Buying Meat Online Safe?

When it comes to buying perishable food online, there’s no such thing as a risk-free venture. But there are ways to optimize your chances. The first thing you should do is to go with a reputable online vendor. Omaha Steaks or Butcher Box, for example, are good places to start. 

You want to go with a company that uses flash freezing, packs their products properly, and ships promptly. If you can’t find this information on their site, you can try looking up online reviews, or call the company yourself.

There may be quantity restrictions, especially during pandemic conditions. But the vendors mentioned above are well known and have a good reputation. They would be a decent standard of quality to compare to as you continue your search.

Is it Expensive?

If you were to use a service like Instacart to hire a shopper/driver to collect your selections for you, the price won’t be much more than what you would normally pay. This is a good service to use if you’re stuck at home for health or other reasons.

But if you’re looking to buy high-quality, prime cuts or hard to find meats, your best bet is to go with a premium service like the ones mentioned above. In this case, you can expect to pay as much as $20 for a single high-quality steak.

That is about par for the course no matter where you shop, which means these companies have done a good job of absorbing the shipping costs.

The Pros & Cons of Online Meat Shopping

Whether you will be best served by buying meat online or going to your local butcher or grocery will depend on your situation. So it’s helpful to cover all of the pertinent virtues of online meat shopping. I think you’ll find that the list of pros stacks up rather well.

Pro: Unbeatable Convenience

It doesn’t get more convenient than delivery right to your door. In some rural locations, front door delivery might be hard to find. But when it works, it works famously.

Pro: More Choice

With a popular, high-quality vendor like the ones mentioned above, you’re going to have an excellent list of selections to choose from. This not only means that it will be easier to match your tastes, but it will also be easier to find high-quality cuts.

Pro: Higher Quality (usually)

Companies that deliver meats almost always use a flash-freezing process prior to shipping. That means they will be fresher on arrival than just about anything you find at the store. Remember, at the store they want it to look nice- and that’s not conducive to safe storage. 

Pro: More Process Transparency

Because of the obvious concerns with putting meat on a truck and driving around the country with it, online meat sellers have responded to high scrutiny with high transparency. 

That’s a good thing. It means they promise more than your local grocery can- and they strive to keep those promises.

Con: It Can Be Expensive

Online meat sellers have to do more to ensure food safety and quality. They have to pay their delivery contractors, who have to use expensive equipment to transport meat. They also have to absorb the costs of delivery failures- which do happen. 

Also, buying higher quality meat is going to be more expensive no matter where you get it. 

Con: Vetting a Vendor May Take Time

To be reasonably sure you’re getting a good product that is safe, you need to scrutinize the vendor. This can take time. Sometimes it can be easy. If you find lots of good reviews online, if you find plenty of info on the seller’s site, and if they take phone calls promptly- you’re in luck.

In some cases, you could vet a company in a few hours. Sometimes it will take longer. But if you compare this to the vetting process of your local grocery- you’ll quickly realize that there really isn’t one other than trial and error.

Con: Food Safety May Be an Issue

As always, food safety can be an issue. But I think you’ll find this to be true no matter where you get your meat from. You should do your best to vet your seller fully. But you should understand that accidents do happen and that in life there’s no such thing as a 100% guarantee.

Conclusion 

At the end of the day, choosing a source for your meats is all about context. The right meat vendor for you, whether it is online or not, is one that provides fresh, high-quality products of your choice at an acceptable price. It may take time to find a seller that ticks all the boxes for you, but when you do, keep those contact details handy for your next big order.

Ultimate Coffee Date

coffee

Let’s say we’re having coffee (a finely ground and richly flavored one of course), and I’m telling you how excited I am about our Montreal trip few short weeks. We are making it an extended weekend, for a bit of a vacation but also because we are running the Rock ‘n Roll Montreal Half Marathon. I’m really looking forward to the run but also exploring a fabulous new city. I’ve never been to Montreal so if any of you have, please feel free to send some recommendations for restaurants, sights to see, and how I can learn French in a few weeks.

Plus, while we’re sipping our coffee, what’s the big stink of Game of Thrones? Anyone? It’s like all I hear about and I feel like I’m missing out on something, because it’s everywhere and my friends and the media and everywhere are always referencing it. Should I binge this bad boy, or what? Because, honestly, I don’t want to, my husband watching and I find that annoying enough, so if anyone can sum it up for me, thanks in advance.

Also, now that we’ve got GOT out of the way, and we have started our second cup of coffee, I will share with you that we are finally planning our housewarming party at the end of the month. It’s been over a year, so we excited to finally open the house to our general public. We honestly haven’t really had anyone over since we moved in, except for a few family members, so now that we have a grill set up and feel like it public ready, we’ll get on that.

Before you finish your coffee, I’ll also wanted to tell you I am fulfilling one of my new year’s resolutions by reading more, reading actual books and on my Kindle. So, my library card and the new Kindle are getting their new year workout, too. I’ve been looking through all the free selections on offer from Amazon Prime and I read one book designated as ‘chick lit’, but found it a bit fluffier for my taste, so I’d like to get into something a little juicier.

My neighbors are still hosting the monthly book club and I have yet to start this month’s selection, “Brothers and Keepers”. At some point I’d like to host the book club, now that I feel like I have a place to put them all, but I have no idea what type of book I would choose. Any good ones that you recommend? I’m pretty open when it comes to genres and new authors, or some of the classics.

So, anything on Montreal, anything for appetizers or fun cocktails for a house warming or something for the grill that may be new, and book recommendations, all welcome! Now I think I may need some decaf.

Get Free Online Psychic Readings To Change Your Life

If you are struggling with uncertainty, curious to know your future, or going through a dilemma, an online psychic reading may give you a clear picture.

People are usually skeptical when it comes to the prediction of their past, present, or future. However, sometimes you need guidance to show you which path to take to decide accordingly. Those who have achieved spiritual enlightenment can sometimes have connections so deep with nature and the environment that they somehow can predict what’s going to happen next. These gifted people may not describe your entire life to you but can show you the outlines or the possibilities of what can happen.

If you are having problems regarding your relationships or career or are stuck in a dilemma and cannot figure out a way through, give it a shot and get your free online psychic reading done. You may not immediately find an answer, but you’ll probably get peace of mind, which will enable you to think clearly and rationally. However, it is recommended that you read on and then make an informed decision whether or not to get a reading.

How can Psychic Readings help you?

The people who are gifted in this field have followed the spiritual path for such a long time that they have completely immersed themselves to become one with nature. They start to think and act rationally and do not let the fear of stress, social pressures, or responsibilities get to them. They’ve reached a whole new level of spiritual enlightenment and become clairvoyant.

Coronavirus pandemic has caused many people to turn towards the spiritual path. However, it has also caused panic, anxiousness, and stress brought about by being in lockdown for an extended time, and for some, losing their jobs, careers, and people they love. Therefore, some people turn towards psychics to receive closure, get mental and emotional strength to endure through difficult times or get ideas to create life-long memories.

Brings positivity to life

If you feel like you are stuck or trapped and lose hope in seeing the light, let a psychic reader help you. They’ll point out your obstacles and problems that you fail to see and guide you in the right direction.

Many people become so bummed out with a life that all they do is start thinking negatively about everything. They lose confidence in themselves, and their mental health goes downhill from there to the point of no return. Psychic readers will provide you with some answers, and if you trust them and follow their guidelines accordingly, it may bring you solace and peace of mind.

Negativity and depression often occur more in pregnant and postpartum women as they go through many hormonal changes every day. Psychic readings can help them heal and help bring positivity into their lives.

Ignites Inspiration

Have you ever thought of an idea that may change your life or career or possibly the entire world and then gave up due to lack of motivation? Get a psychic reading from a professional and reignite that fire. They can help you predict the outcomes and prepare you mentally for the future. You’ll soon find out that your passion has been reignited, which will make you follow your dreams and fulfill your plans that you left incomplete.

Brings you closure

The COVID-19 pandemic has left many in distress due to the loss of their loved ones. Psychic readers will be able to help you get out of the hole that has been left in your heart and restore your faith in love and hope.

They’ll also help you move on if you had heartbreaks and make you see the fact that happiness can only be created by you and you only. They will play a vital role in your life to bring you the answers and closure you need.

Medium to De-stress

Stress, anxiety, and depression take a toll on a person’s mental and emotional health. Psychics can take your mind off it by predicting your future to ignite hope and faith again and find out the hurdles that stop you from moving on.

There are also other ways to make yourself de-stress by keeping yourself busy with household chores, cooking healthy meals, taking breaks during work, and most importantly, focusing on a little “me time” every day. You deserve it!

Find your purpose

Psychics believe we are all here in this universe to serve a purpose. If you do not yet have an answer to yours, psychic readers can help you unveil yourself to find out what your purpose in life truly is. After that, everything you do will slowly fall into place and make you feel satisfied and content.

Are Psychic Readings legit?

As I mentioned at the beginning, some may be skeptical when it comes to psychic readings about their past, present, or future. Although there are many frauds out there who are more interested in acquiring money, some are truly gifted.

A genuine psychic will first give you an overview of your entire life until now and then advise you on the best course of action. They’ll be able to take a peek into your future and make it easier for you to make tough decisions. A legit psychic will be able to predict a lot of future outcomes so that you’ll be able to comprehend and set up plans accordingly. It is true that a lot of it is predictions, but these can help you prepare yourself mentally and emotionally and make rational decisions with a clear conscience.

Having connections with nature and the environment makes one achieve a high level of enlightenment to peep into someone’s past, present, and future life. Although they may not be able to map out your life for you entirely, they’ll give you pieces of advice that may guide you to make hard decisions and also enhance your outlook on life positively.

How Is CBD Oil Different From Hemp Oil?

It’s easy to be confused by all the different Hemp-derived products on the market. The Farm Act of 2018 formally legalized Hemp in all its forms, although certain restrictions still apply. It had been somewhat legal since 2014, but only on an “experimental” basis.

That has opened the door for a whole slew of Cannabis-derived products, with more arriving on the scene all the time. One of the more confusing things is the existence of both CBD oil and Hemp oil. Are these the same thing? If not, how are they different? These questions and more will be answered as we go.

CBD Oil

CBD is meant to be a relatively pure extract. It contains only trace amounts of other cannabinoids such as CBN and THC so that you get the effects of CBD alone. This is relevant for many users because CBD (when isolated) does not necessarily have the same effects as the Cannabis plant. This is due to something called “the entourage effect,” which we will discuss later. For now, just understand that isolated cannabinoids behave differently when used together.

For example, it is a fact that CBD can sometimes cause a reduction in appetite. This usually occurs when someone has taken an especially large dose, and that is very interesting. It’s interesting because the Cannabis plant, when smoked, tends to stimulate hunger. Yet, the CBD (when isolated) has the opposite effect.

There are a number of devices on the market that can be used to test the purity of CBD oil, and you should not hesitate to get one of these if you are going to be buying CBD oil on a long-term basis. It should have a purity level to match that which is advertised.

Hemp Oil

There are two different products that might be referred to as “Hemp oil.” First, let’s discuss the kind that contains CBD. This will be labeled as such and might also be called “full-spectrum.” These products are extremely similar to the CBD oils that we have already discussed at length, except that they contain much greater amounts of other cannabinoid substances.

Obviously, they cannot have more than 0.3% THC, as that would make them illegal in most places. However, the Hemp plant contains well over a hundred different cannabinoids, and only one of them is illegal.

The “entourage effect” that we mentioned earlier is the reason that some people choose to go with full-spectrum Hemp oil. The Cannabis plant has been used medicinally for many centuries, with some sources going back thousands of years. However, all of those people were working with the whole plant or with simple extracts.

Thus, a simple extract like this is probably better for those who want to use traditional methods. What you get is something that contains all the same components as the source plant, but in a stronger and more concentrated form. There have been numerous studies showing that the properties of cannabinoids can change when they are separated, so there is some logic in using this kind of oil.

That brings us to Hempseed oil, which is the other kind of Hemp oil that you might find on the market. The main thing you need to understand about this stuff is that it contains little to no CBD. It is made entirely from the seeds, and those do not contain any significant amounts of cannabinoids. If you have ever wondered why so many people throw away their Cannabis seeds, that is the main reason.

However, hemp seeds have a very high nutrient value, and that makes them worth using. People don’t buy Hempseed oil so that they can enjoy the benefits of CBD. Instead, they purchase this stuff for its antioxidant and nutritional value. Hemp seeds have been cultivated for food since ancient times, although you don’t see nearly as much of that going on today.

You may have heard that CBD is a strong antioxidant, and that is true. What you may not know is that the seeds contain a large number of other antioxidants. These include Omega-3 fatty acids, Omega-6 fatty acids, Vitamin D, and Gamma-linolenic acid. The beneficial effects of antioxidants have been confirmed many times, and those omega fatty acids are some of the very best. Hemp seeds are a great way to get a big bunch of those antioxidants at every meal.

Conclusion

We hope that the above has provided a clear and concise answer to the question posed in the title. As you can see, CBD oil and Hemp oil are not really the same thing, even though both are derived from the same plant. It is always important to know what you are buying, as none of us can afford to waste money. Still, all of these things are useful in one way or another. We thank you for coming here once again to learn from us, and we hope to see you again soon.

3 Vegetarian Dishes That Meat Eaters Will Also Love

The benefits of a plant based diet have been brought to the fore through a number of high profile documentaries and books in recent times. As a result, more and more people are turning vegetarian for more than purely ethical reasons. A large number of them have been long term meat eaters who have, arguably, come to the light. But that doesn’t mean that they have lost their love of meat. There are also many households where the person who does the cooking is a vegetarian while others in the home are meat eaters. That’s why we’ve put together this collection of vegetarian dishes that meat lovers will also love.

These recipes are designed to be filling, easy to make and delicious. If you are a person who is considering switching to vegetarian but still love meat and don’t have a whole lot of experience in the kitchen, these recipes are precisely what you need.

5 Meat Replacements You’ll Love

Here are 5 protein rich, texture filled vegan friendly alternatives that you can add to recipes on plant based diets.

Tofu

Tofu is made from coagulated soy milk that is pressed into a solid white block. The tasteless product that results is rich in protein and takes on the flavor of the foods it is combined with. A four ounce serving contains 11 grams of protein and just 1.3 grams of carbohydrates.

Tempeh

Tempeh is also made from soy but, rather than soy milk, the entire bean is used to create a cakish product. Half a cup of tempeh contains 17 grams of protein and 6.3 grams of carbs.

Mushrooms

With their full, meaty texture and flavor, mushrooms – especially large ones like Portabella – are a terrific meat substitute. As a bonus, mushrooms are high in fiber, which is good news for your digestive system. One cup of Portabella mushrooms will provide you with 5.2 grams of protein, 6 grams of carbs and 2.7 grams of fiber.

Beans

All sorts of beans can serve as a hearty, healthy meat replacement. You won’t get all of the essential amino acids in one single bean but mixing them up will cover all of your bases. In a cup of black beans you get 14.5 grams of protein and around 34 grams of carbs.

Jackfruit

Jackfruit is a large fruit that grows on trees and originates in south eastern Asia. When eaten ripe, it is sweet and delicious like a pineapple. When cooked, however, it has a chewy, pull apart texture that is very much like pulled pork. One cup of raw jackfruit contains 2.4 grams of protein and 40 grams of carbohydrates.

Tortilla Soup Recipe

Ingredients

  • 1 can tomato soup
  • ½ cup cooked Jasmine rice
  • 3 cups water
  • ½ cup zucchini cut into square chunks
  • Squeeze of lime juice
  • Cilantro leaves
  • Chipotle to taste
  • 2 corn tortillas

Method

  • Pour the tomato soup, water and Jasmine rice into a pot and cook at a medium heat.
  • After 3 minutes, add the zucchini, lime juice and chipotle.
  • Cover and cook for 10 minutes.
  • Bake the tortillas in a pan for 2 minutes.
  • Cut the tortillas into strips and then add to the soup.
  • Allow the soup to simmer for a further 5 minutes.

Mushroom Tinga

Ingredients

  • 2 large Portabella mushrooms cut into thin strips
  • ¾ white onion cut into strips
  • 2 tomatoes
  • 1 garlic clove
  • ¼ teaspoon chipotle powder
  • Cilantro leaves
  • 14 cup oregano
  • 2 corn tortillas

Method

  • Add the white onions to a pot and cook on a medium heat for 3 minutes.
  • Add the Portabella mushrooms.
  • Place the tomatoes, garlic, chipotle powder, and oregano in a blender and blend for 30 seconds on high.
  • Add the blended mixture to the pot and cook for a further 8 minutes.
  • Top with cilantro.
  • Bake the corn tortillas in a pan until crispy.
  • Serve the Tinga on the tortillas and top with avocado.

BBQ Pulled Jackfruit Sandwiches

Ingredients

  • 1 can young, green jackfruit in brine
  • 1 small white onion, chopped
  • ½ garlic, chopped
  • 1 tablespoon extra virgin olive oil
  • ¼ vegetable broth
  • BBQ Sauce
  • Wholemeal bread
  • Butter

Method

  • Drain and rinse the jack and then cut them into small pieces. Cut off and throw away any cores.
  • Add extra virgin olive oil to a pan on medium heat.
  • Add garlic and onions and saute.
  • When the onions begin to brown, add jackfruit.
  • Add the vegetable broth
  • Cover and cook for 8-10 minutes until the jackfruit has softened.
  • Mash with a potato masher until the jackfruit is pulled and stranded.
  • Spread the mixture on a large baking sheet.
  • Pour BBQ sauce over the mixture.
  • Bake in the oven for 10 minutes on a medium heat.
  • Remove from the oven and stir in a little more BBQ sauce.
  • Serve in a wholemeal sandwich

3 Weight Loss Tips for the New Year

Weight loss tips

With New Year’s Day quickly approaching, there are lots of people who are looking to make resolutions. If weight loss is your goal this year, it is important that you arm yourself with the tools to make this a successful venture. Weight loss is not always an easy task, but it is possible with some diligence and hard work. There are many methods to weight loss, but it is important to keep some common sense tips in mind to make your weight loss journey as effective as possible.

1. Eat More Often With Smaller Portions

When you are trying to lose weight, it makes sense that you should eat less. But few people consider that you should be eating more often. Instead of fasting all day and stuffing yourself at dinnertime, it is better to eat several small meals throughout the day. You should ideally be eating breakfast, lunch and dinner and two snacks a day. The snacks should be eaten mid-morning and mid-afternoon. It is important that you stay within your recommended calorie count, so make sure you are choosing the right kinds of snack food. The idea is to be never completely full but never hungry.

2. Keep Your Mouth Occupied

For a lot of people, snacking is a habit. It is something that you do when you are bored and not actually hungry. One way to overcome this is by keeping your mouth occupied. This means chewing gum, using vaping supplies from www.smokingthings.com or drinking lots of water throughout the day. These things will keep you from reaching for snack foods just because you can. It takes some concerted effort on your part, but with a little practice, you can master it in no time.

3. Eat the Right Things

A diet full of fat-filled and carbohydrate-rich foods is not going to do you any favors. If your eating habits are not the healthiest, now is the time to reevaluate them. You need to choose nutritious, whole foods whenever possible. Try to buy foods in their most natural state; this means you should avoid highly processed foods. This will help you meet your nutritional needs, which will keep you full longer. You will feel better and look better too!

Losing weight does not have to seem like an impossible feat when you have these tips in mind. You must set out to make a lifestyle change, and the results you want will be yours.

Ingredients And Benefits Of Ortho Biotic Capsules

Probiotics

Ortho Biotic is a formula that has unique probiotic elements. The formula was created to deliver active organisms that help in promoting healthy gut microflora, protect intestinal integrity, and improves the function of the immune system. 

Generally, ortho biotic is dietary supplements. The benefits of these capsules include supporting the digestion and absorption of micronutrients. It also supports bowel regularity along with maintaining gastrointestinal balance and increasing secretory immunoglobulin for enhanced immunity. 

In this article, we have discussed the ingredients of Ortho Biotic Capsules and why were they chosen for the supplement. 

Also, grab your Ortho Biotic 60-count packs by Ortho Molecular

Benefits of the Ingredients

Lactobacillus Acidophilus (La-14)

Lactobacillus acidophilus is considered to be a beneficial strain consisting of bacteria which is usually found in the intestinal tract and mouth. It is also used in various dairy products as it helps in the production of acidophilus-type yogurt. 

Lactobacillus acidophilus also helps in producing various carbohydrates such as lactic acid which is used in increasing the absorption and bioavailability of minerals. More ingredients include copper, magnesium, calcium, and manganese. The production of lactic acid improves health by creating a hostile environment for the microbes. 

Furthermore, the reason Lactobacillus acidophilus strain is chosen in the Ortho Biotic is because of its survival attributes and strong adherence that helps in the gastrointestinal tract. It is demonstrated that this ingredient can tolerate gastric acid and bile salts that help in withstanding antibiotics. They include Tetracycline, Polymyxin, Ciproflaxin, etc. 

Lactobacillus Paracasei (LPC-37)

Lactobacillus Paracasei is an ingredient that has been demonstrated to protect the body against the harmful effects of bacteria in the intestinal tract. Generally, lactobacillus paracasei reinforces and creates defense mechanisms in the intestinal tract that support the overall immune response. This is done by supporting cell production and secreting immunoglobulin. The reason it is chosen for the Ortho Biotic supplements is that it has the gastric acid-resistant ability. 

 Bifidobacterium Bilidum (Bb-02)

 Bifidobacterium Bilidum is another active ingredient that is shown to effectively compete with harmful bacteria which includes E.coli, aureus, etc. This ingredient helps with the production of lactic acid and other acidic production that provides antagonistic actions to help maintain the balance of microflora and pathogens.

Bifidobacterium Lactis (BI-04)

Bifidobacterium Lactis is an element that is mainly found in the colon. A controlled trial done on this ingredient showed that Bifidobacterium lactis supports and balances the immune response for a good eight weeks. This ingredient should be taken in a supplement form by individuals who are hypersensitive to environmental allergies. Some studies have also shown that Bifidobacterium lactis helps in immune development and supports gastrointestinal health by reducing the permeability of the intestine.  

Lactobacillus Plantarum (Lp-115)

Lactobacillus Plantarum is considered to be an extremely beneficial bacteria that are found to compete and act against lethal proteins and strains of Clostridium difficile and perfringens that boosts bacterial growth. It is a bacteria that is commonly found in foods such as pickles, brined olives, and sourdough. These foods are known as fermented foods. Some studies also show that these foods and the Lactobacillus Plantarum can boost the immune system.

How to Teach Your Kids to Be Self-Confident Without Sports

Some kids seem like they come out of the womb sporting a baseball mitt while others couldn’t even be bothered to throw a ball. Every child is a unique individual, and as parents, we’re all about supporting their strengths. 

But when you learned self-confidence on the basketball court, how do you pass those lessons on without sports? And what can you expect for their future?

There’s even an outdated belief that your kids will be more vulnerable to drug addiction if they don’t participate in sports. So if you’re seeing addictive personality signs, it’s natural to be a little worried. 

And there are also plenty of ways to teach your kids to be self-confident without sports. In this post, we’ll explore some of the most effective methods. 

Let your kids solve their own problems

When you step in and solve every problem for your child, you aren’t empowering them to take risks and take care of themselves with confidence. This can leave them feeling ultra-dependent on you, which means they’ll feel insecure when you’re not around. 

Resist the urge to jump in and fix everything right away. Instead, let your kids know that you’re there if they need help, but you want them to work things out themselves. This can go for anything from tying shoes to working out problems on the playground. When they see all that they can do for themselves, they will be proud and move forward with increased confidence. 

Encourage curiosity

As parents, we can sometimes take an overbearing approach without even realizing it. For example, how do you handle it when your kid wants to conduct a messy experiment? You already know it’s not going to work as your child has planned. Do you let them do it anyway?

When we step back and let our children try, fail and learn, they will build confidence and hands-on experience that they won’t get from us telling them “no.” 

Instead, encourage them to experiment with all things. You may even find a few fun experiments for them to try. Each time they try something new, they’re gaining knowledge, experience and confidence. 

Encourage mistakes

How you handle your child’s mistakes will have a major impact on their confidence. If they’re afraid to fail around you, they’ll become people who fear failure. In order to be confident, your child must feel comfortable trying. So be careful about how you respond to their mistakes. It’s okay to give constructive criticisms, but always keep the tone positive. 

Instead of saying something like, “that’s not quite right,” try something like, “that’s awesome, and I bet with some practice, you can make it look just like this.” 

Mistakes mean your child is trying, and that’s always going to be a good thing. 

Try new things together

If you want your child to be confident, it’s important to lead by example. Let your child see you trying new things and having new experiences. This is especially important for those times when we find ourselves in a rut. It’s those times when we find ourselves spending too much time on the couch and not enough time enjoying life… those times are bad for us all. 

In those moments, look for things you can try together as a family. Visit a new place or try a Groupon for something new. Try painting or paintballing. Do something to get everyone out of their comfort zone. Not only will this make it easier for your kids to try new things, but they will become more experienced along the way. So that thing that they’ve never done before will become part of their repertoire. 

Curb your worry

It’s only natural for us to worry about our children, but too much worry from parents can transfer to the child. So do your best to curb your worrying expressions and words. Try to avoid the words “be careful.” And instead, think of more encouraging things you can say. If you’re really worried about something, find a way to point out the potential danger without assuming your child will fall into it. 

And if you’re suffering from anxiety, do what you can to find treatment because your worries may be causing anxiety in your child. 

Kids can definitely learn self-confidence from playing sports in school, but that’s not the only way. You can teach your child to be self-confident during everyday circumstances — whether they play sports or not.